Quantcast
Channel: Share Your Work - Processing 2.x and 3.x Forum
Viewing all 428 articles
Browse latest View live

Tutorial: Installing Processing 3.x on Ubuntu Linux Computers


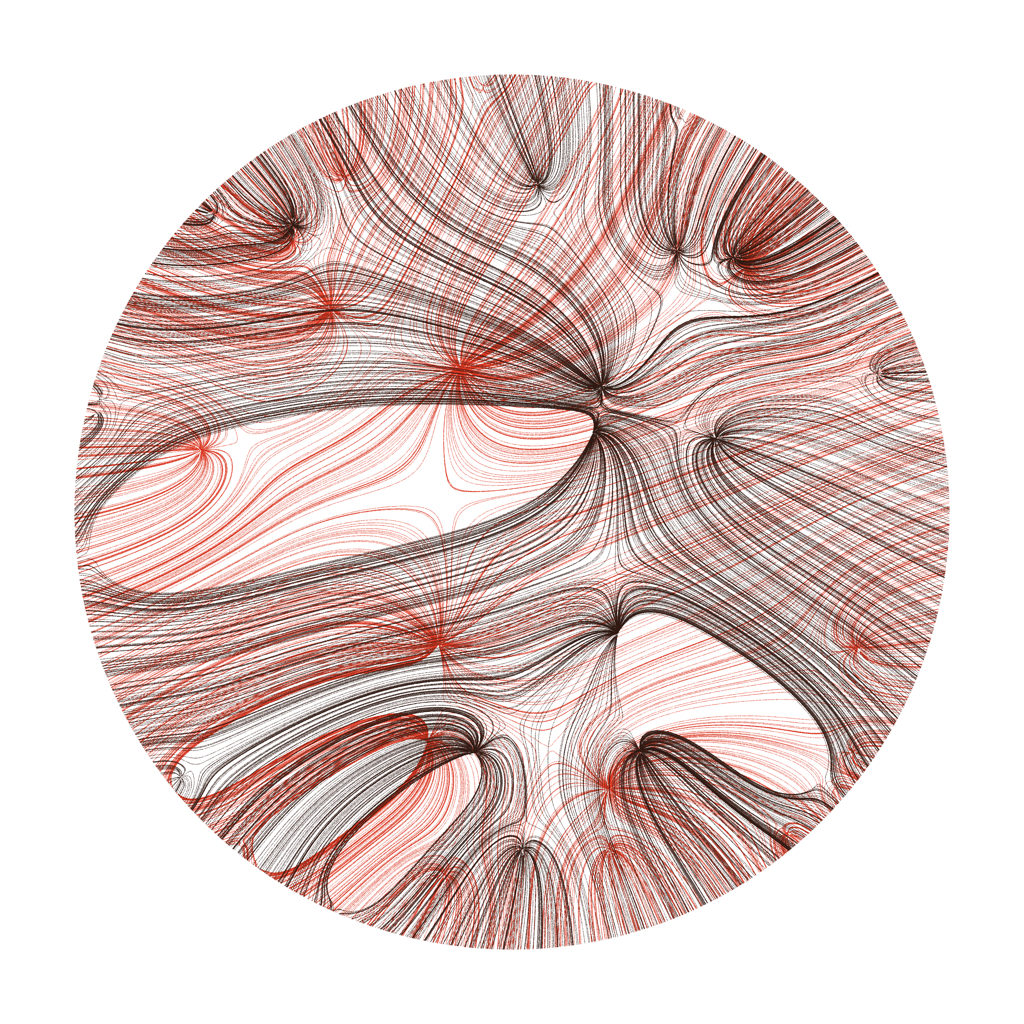
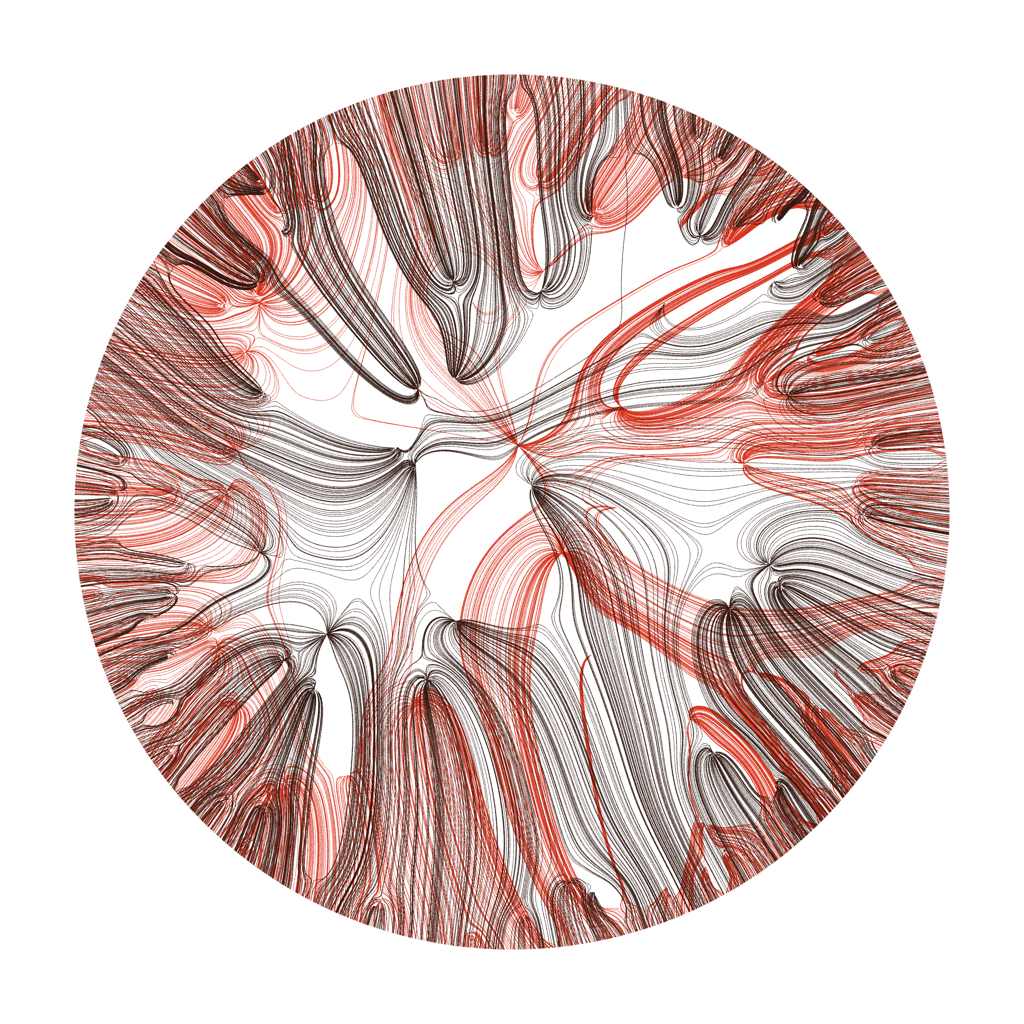
Drawings of mars

$
0
0

Hi,

This is my processing work—inspired by various things like 19th century observational drawings of Mars, Bruno Munari (How to Draw the Sun), etc.

I've created a twitter bot, Canali Bot, that tweets a new image every 6 hours or so:

https://twitter.com/canalsofmars

Live video delay effect, where from here?

$
0
0

Hi! I've just started my studies on live video manipulation in processing. Today I created this simple delay effect, which feels like a good starting points for more advanced stuff. Any ideas on how to develop this further? I've been experimenting with translation and rotation which renders pretty interesting results. I've tried some stuff with colors but no luck there yet.

press and hold any key to start sampling and effect

import processing.video.*;

Capture camera;
int scale = 1;
void setup()
{
  size(640, 480, P3D);
  colorMode(HSB, 255);

  String[] cameras = Capture.list();

  camera = new Capture(this, width/scale, height/scale, cameras[0]);
  camera.start();

  // init feedback loop
  frames = new PImage[frame_count];
  for(int i = 0; i < frame_count; i++)
  {
      frames[i] = createImage(0, 0, 0);
  }
}

int frame_count = 10;
PImage[] frames;
boolean feedback = false;
void draw()
{
  background(255);

  if(keyPressed)
  {
    image(frames[index], 0, 0);
    for(int i = 0; i < frame_count; i++)
    {
      pushMatrix();
      pushStyle();

      tint(255, 255 / frame_count);
      //translate(0, 0, i * 80 / frame_count);
      image(frames[(index + i) % frame_count], 0, 0);

      popStyle();
      popMatrix();
    }
  }
  else
  {
    image(camera, 0, 0);
  }

  text(frameRate, 20, 20);
}


int index = 0;
void captureEvent(Capture camera)
{
  camera.read();
  PImage p = camera;

  if(keyPressed)
  {
    frames[index] = p.copy();
  }

  index += 1;
  if(index == frame_count)
  {
    index = 0;
  }
}

Downloading Data from Thingspeak

$
0
0

This is a short example of how to download a block of data from a Thingspeak channel with Processing. Explanations are in the comments.

        //This sketch retrieves a large block of data from thingspeak. Here I use json as the format, though this can
        //be done (with different parsing) with xml or csv files.
        // You can see the raw json file by pasting the following into the address bar of your browser:
        // http:// api.thingspeak.com/channels/11653/feed.json?key=E593NEBDKFBC84D6&start=2011-11-11%2010:10:10&end=2014-11-11%2011:11:11
        // Details on how to construct these urls can be found at Thingspeak Community: community.thingspeak.com/documentation/api/

        JSONObject json; // this is the full json object including the headers
        JSONArray totalData; // this is the array in the feeds part
        JSONObject record; // this is each one of the small json objects in the array
        int id; // this is just a counter provided by Thingspeak that increments with each new posted data point. It is an int
        String timeStamp; // this is the full time stamp provided by Thingspeak. It could be parsed to extract specific information for visualization
        int temp; // this is the data point that I uploaded from my arduino
        // (a TMP36 analog temperature sensor --> Arduino Uno --> Ethernet Shield --> Thingspeak) using a standard arduino upload program

        void setup() {
          //below, you should use your own channel. If your channel is public, you don't need a key. If your channel is private, you need to generate a read key.
          json = loadJSONObject("http://"+"api.thingspeak.com/channels/11653/feed.json?key=E593NEBDKFBC84D6&start=2011-11-11%2010:10:10&end=2014-11-11%2011:11:11");
          totalData = json.getJSONArray("feeds"); // this moves just the records we care about into a special type of array called a JSONArray
          for (int i = 0; i < totalData.size(); i++) { // step through the array, one record at a time
            record = totalData.getJSONObject(i); // remember the items in the array are also JSON objects
            id = record.getInt("entry_id"); // the key "entry_id" is given by Thingspeak. This is essentially a counter
            timeStamp = record.getString("created_at"); // the key "created_at" is also given by Thingspeak. I will write a parser to unpack it into a Date class soon.
            temp = int(record.getString("field1")); // Thingspeak stored this as a string so I have to convert it to an int for visualisation
            println(id + ", " + timeStamp + ", " + temp); // Just checking that it is all there.
          }
        }

Evolve a deep neural network

Convert mp4 to mp3 + calling command line programs from Processing

$
0
0

Hi! I was asked how to get the audio out of a video file, so I shared this little program:

https://github.com/hamoid/Fun-Programming/blob/master/processing/ideas/2017/05/extractAudioWithFfmpeg/extractAudioWithFfmpeg.pde

It also serves as an example of calling any command line program. There's thousands of command line programs to do all kinds of audio, video and image manipulation. It's like a massive Processing library :) A bit geeky, but powerful.

Some media related command line tools:

What other tools should be in this list?

handling command line arguments in a sketch

$
0
0

processing sketches can handle command line arguments. here is how to do so:

void setup() {
  if (args != null) {
    println(args.length);
    for (int i = 0; i < args.length; i++) {
      println(args[i]);
    }
  } else {
    println("args == null");
  }
}

here is how to invoke a sketch while passing command line arguments and the output:

$ processing-java --sketch=sketchname --run argu "arg o"
2
argu
arg o

here is output when not passing arguments:

$ processing-java --sketch=sketchname --run
args == null

as far as i know it is not possible to pass command line arguments when runnig the sketch from the processing editor. args will always be null in the editor. it is prudent to code some sensible default.


i posted this because i wanted handle command line arguments and searched the forum and only got vague hints how to do so. i managed to do it and now want to share the knowledge. i hope this will help future hackers wanting to see the generated java code.

here are some of the threads with the vague hints:

To anyone experiencing low frame rates when using image() many times

$
0
0

Greetings,

I had a very big problem in an app I'm developing. So far I've only used it JAVA Mode, and my framerates where about 20-30 fps, so on a tablet the sketch would never work. I've googled to my best ability but couldn't find a solution.

The game is a word game, and has an 9*11 grid of letter tiles (plus the background). Each one of these is a pre-loaded PImage of 55x55px. If I remove the image() function in the tiles display() method, the problem went away.

So my question was how in the world do I display that many images without problem? A game like Minecraft can display thousands of images, in higher pixel dimensions, in 3D, and at high framerates. Why couldn't I?

I reduced the code to the problem below (image file below too if you want to test). Right before I was about to post on this forum to get help, I tried taking the size to display parameters out of the image() call. And it worked. The on-the-fly display size of the image was taking up way too much CPU.

If you're having this same problem, hopefully your problem is the same, and you can fix it easily like I have. Modifications:

Add this in setup: tile.resize(round(full_tile), round(full_tile));

Change this in draw: image(tile, grid[x][y].x, grid[x][y].y);

And that is it! Hope this helps!

PImage tile;

float full_tile;
float three_quarter_tile;
float half_tile;
float quarter_tile;
float eighth_tile;

PVector grid_tile_dims;
PVector[][] grid;
PVector grid_corner;


void setup()
{
  size(1280, 720);

  tile = loadImage("tile.png");

  full_tile = height/12;
  three_quarter_tile = full_tile * 0.75;
  half_tile = full_tile * 0.5;
  quarter_tile = full_tile * 0.25;
  eighth_tile = full_tile * 0.125;

  grid_tile_dims = new PVector(11, 9);
  grid = new PVector[int(grid_tile_dims.x)][int(grid_tile_dims.y)];
  float grid_step = eighth_tile;
  grid_corner = new PVector(width - (half_tile + ((height - ((grid_tile_dims.y * full_tile) + ((grid_tile_dims.y - 1) * grid_step)))/2)), quarter_tile + ((height - ((grid_tile_dims.y * full_tile) + ((grid_tile_dims.y -1) * grid_step)))/2));


  for   (int y = 0; y < int(grid_tile_dims.y); y++)
  {
    for (int x = 0; x < int(grid_tile_dims.x); x++)
    {
      float sep = 0;
      if (x % 2 != 0.0) sep = half_tile;
      grid[x][y] = new PVector(grid_corner.x - ((full_tile + grid_step) * x), sep + grid_corner.y + ((full_tile + grid_step) * y));
    }
  }
}


void draw()
{
  background(255);

  for (int y = 0; y < int(grid_tile_dims.y); y++)
  {
    for (int x = 0; x < int(grid_tile_dims.x); x++)
    {
      if(!mousePressed) image(tile, grid[x][y].x, grid[x][y].y, full_tile, full_tile);
    }
  }

  fill(0);
  textAlign(LEFT, TOP);
  textSize(height/32);
  text(int(frameRate), 2, 2);
}

tile


Generative Design Variations, Photos

$
0
0

Hi,

When I was eight years old I remember that there lived a man in our street who owned a photo-camera. The fourth chapter (of ten) that Jeanne de Bont and I have written and designed is about photography and video. Knowing that this chapter is about manipulating and modifying photos and movies.

Greetings,

Henk Lamers

http://issuu.com/loftmatic_henklamers/docs/gdv4_photos_03/1

GDV_4

WiFi Wireless IMU with ESP8266 and p5.js

$
0
0

I developed a project for an ESP8266 board + BNO055 IMU board that sends Euler angles to a p5.js sketch showing a 3D airplane. The ESP8266 and IMU run on battery so the sensor package is enclosed inside a foam model airplane (no wires). The ESP8266 hosts a web server so node.js/socket.io are not used. Any web browser with HTML5 web sockets and WebGL can connect to the ESP8266 web server and see the 3D virtual airplane orientation match the orientation of the foam airplane.

This can be generalized to any sensor supported by the ESP8266. The ESP8266 uses HTML5 web sockets to stream sensor data to the p5.js sketch. More details are in my blog post. Source code is on github.com.

Visualizing three dimensional arrays

$
0
0

To a computer, arrays don't have any kind of a shape or dimension, they are just blocks of space where a value can be stored and retrieved. But most humans don't really think like this, it's usually easier to understand something if we can SEE it.

So, how do we "SEE" arrays?

Well, a regular, one dimensional array can be imagined like a numbered list of values stacked on top of eachother, and a two dimensional array might be seen as a chess board with numbered rows and numbered squares in each row...... but how do you imagine a three dimensional array? How about a four dimensional one?

This is a sketch I made to show how three dimensional arrays can be visualized in the real world. The idea is that there is a cube (which represents a three dimensional array) that has x layers, inside each layer are x rows, and in each row there are x values. In this particular sketch, I used a cube with four layers that have four rows and four values in those rows, so in all there are 64 unique values.

In this sketch, you use the number keys to choose a layer, row, or value, and you use BACKSPACE to go back a level:

Code:

// A three dimensional array (The cube)
// The fist "[]" represents the layer, while the second "[]" is the row in that layer and the
// third is the value in that row
String[][][] dim = {

   {{"0a", "0b", "0c", "0d"},
    {"0e", "0f", "0g", "0h"}, // Layer 0
    {"0i", "0j", "0k", "0L"},
    {"0m", "0n", "0o", "0p"}},

   {{"1a", "1b", "1c", "1d"},
    {"1e", "1f", "1g", "1h"}, // Layer 1
    {"1i", "1j", "1k", "1L"},
    {"1m", "1n", "1o", "1p"}},

   {{"2a", "2b", "2c", "2d"},
    {"2e", "2f", "2g", "2h"}, // Layer 2
    {"2i", "2j", "2k", "2L"},
    {"2m", "2n", "2o", "2p"}},

   {{"3a", "3b", "3c", "3d"},
    {"3e", "3f", "3g", "3h"}, // Layer 3
    {"3i", "3j", "3k", "3L"},
    {"3m", "3n", "3o", "3p"}}

};

int lay = -1; // The layer of the cube (cube 0)
int row = -1; // The row in that layer
int val = -1; // The value in that row

boolean show_startScreen = true;

void setup() {
  size(500, 500);
  rectMode(CENTER);
  textAlign(CENTER, CENTER);
  stroke(255);
  textSize(30);
  noFill();
  noLoop(); // I don't need the program to run more than once unless a key is pressed
            //and something is changed (so redraw will be run in "void keyPressed()")
}

void draw() {
  background(0);

  if (show_startScreen) {   //if the start screen is still being shown, draw it!
    text("Multidimensional Array\nVisualization Tool", 250, 100);
    rect(250, 255, 350, 50);
    text("Press any key to begin", 250, 250);
    textSize(20);
    text("Cyber_Agent\n:)", 250, 400); //The totally awesome guy who made it
    textSize(30);
  } else {
    if (lay == -1) {  // if a layer has not been chosen
      text("Cube 0:", 250, 30);
      text("Choose a layer", 250, 460);
      rect(175, 175, 200, 200);
      text("0", 250, 95);
      rect(225, 225, 200, 200);
      text("1", 300, 145);
      rect(275, 275, 200, 200);
      text("2", 350, 195);
      rect(325, 325, 200, 200);
      text("3", 400, 245);
    } else if (row == -1) {  // if a row has not been chosen
      rect(250, 250, 400, 400);
      text("Layer " + lay + ":", 250, 20);
      text("Choose a row", 250, 475);
      rect(250, 105, 350, 50);
      text("0", 100, 100);
      rect(250, 200, 350, 50);
      text("1", 100, 195);
      rect(250, 300, 350, 50);
      text("2", 100, 295);
      rect(250, 400, 350, 50);
      text("3", 100, 395);
    } else if (val == -1) {  // if a value has not been chosen
      text("Row " + row + ":", 250, 100);
      text("Choose a value", 250, 400);
      rect(100, 250, 100, 100);
      text("0", 100, 250);
      rect(200, 250, 100, 100);
      text("1", 200, 250);
      rect(300, 250, 100, 100);
      text("2", 300, 250);
      rect(400, 250, 100, 100);
      text("3", 400, 250);
    } else {  //show a value
      text("Value " + val + ":", 250, 100);
      rect(250, 250, 100, 100);
      text(dim[lay][row][val], 250, 250);
      text("[" + lay + "]" + "[" + row + "]" + "[" + val + "]", 250, 400);  //show the actual location/ address of your chosen value
    }
  }
}

void keyPressed() {
  if (!show_startScreen) {  // If the start screen has been passed
    if (keyCode == BACKSPACE) {  // go back a level
      if (val != -1) {
        val = -1;
      } else if (row != -1) {
        row = -1;
      } else if (lay != -1) {
        lay = -1;
      }
    } else if (key == '0' || key == '1'|| key == '2'|| key == '3') { //make sure that the pressed key was a 0, 1, 2, or 3
      if (lay == -1) { // if layer has not been set, set it!
        lay = Integer.parseInt(str(key)); //covert the pressed key to an int, and store it
      } else if (row == -1) {  // if layer has not been set, set it!
        row = Integer.parseInt(str(key)); //covert the pressed key to an int, and store it
      } else if (val == -1) {  // if layer has not been set, set it!
        val = Integer.parseInt(str(key)); //covert the pressed key to an int, and store it
      }
    }
  } else {
    show_startScreen = false;
  }
  key = 'q'; // This gets rid of some loopholes
  redraw(); // Run the code in "draw()" once more
}

end of code

Honestly, this is so random and I don't think that this has any practical uses, but I am going to keep it handy just in case I suddenly forget how to wrap my head around three dimensional arrays.

P.S. A four dimensional array could be imagined as x cubes, each with x layers, and x rows in those layers, and x values in those rows. Perhaps a five dimensional array would be x groups of x cubes with x layers with x rows with x values. And so on....
Sharing programs created (at Processing Tool).

Circle packing clock ideas?

$
0
0

Here is the code for a clock using the circle packing from a youtube tutorial. I am looking for any ideas of what to add to this project or any ideas of how to improve my code here (I know it's messy).

int grid = 50;
Screen hrscreen;
Screen mnscreen;
int circleamn;
char mn2;
char mn1;
char hr1;
char hr2;
int currentmin;
ArrayList<Circle> circles;

void setup() {
  background(0);
  size(1000, 1000);
  frameRate(120);
  surface.setResizable(true);
  circles = new ArrayList<Circle>();
  circleamn = 0;
  currentmin = minute();
}

void draw() {
  background(80);
  grid = width / 26;

  String hr = str(hour());
  String mn = str(minute());
  char colon = 'c';

  if (int(hr) > 12) {
    hr = str(int(hr) - 12);
  }

  if (int(mn) > 9)
  {
    mn1 = mn.charAt(0);
    mn2 = mn.charAt(1);
  } else {
    mn1 = '0';
    mn2 = mn.charAt(0);
  }

  if (int(hr) > 9)
  {
    hr1 = hr.charAt(0);
    hr2 = hr.charAt(1);
  } else {
    hr1 = '0';
    hr2 = hr.charAt(0);
  }

  if (currentmin == int(mn))
  {
    Screen hrscreen = new Screen(hr1, "hr");
    Screen hr2screen = new Screen(hr2, "hr2");
    Screen mnscreen = new Screen(mn1, "mn");
    Screen mn2screen = new Screen(mn2, "mn2");
    Screen colonscreen = new Screen(colon, "colon");

    drawCircles(hrscreen);
    drawCircles(hr2screen);
    drawCircles(mnscreen);
    drawCircles(mn2screen);
    drawCircles(colonscreen);
  } else {
    circles.clear();
    currentmin = int(mn);
  }
}

Circle newCircle(ArrayList<PVector> spots) {

  int r = int(random(0, spots.size()));
  PVector spot = spots.get(r);
  float x = spot.x;
  float y = spot.y;
  boolean valid = true;

  for (Circle c : circles) {
    float d = dist(x, y, c.x, c.y);
    if (d < c.r + 10) {
      valid = false;
      break;
    }
  }

  if (valid) {
    return new Circle(x, y);
  } else {
    return null;
  }
}

void drawCircles(Screen screen) {
  int circlesperframe = 10;
  for (int i = 0; i < circlesperframe; i++) {
    Circle newC = newCircle(screen.spots);
    if (newC != null) {
      circles.add(newC);
    }
  }

  for (Circle c : circles) {
    if (c.growing) {
      if (c.edges()) {
        c.growing = false;
      } else {
        for (Circle other : circles) {
          if (c != other) {
            float d = dist(c.x, c.y, other.x, other.y);
            if (d - 2 < c.r + other.r) {
              c.growing = false;
              break;
            }
          }
        }
      }
    }
    c.show();
    c.grow();
  }
}

class Circle {
  float x;
  float y;
  float r;

  boolean growing = true;

  Circle(float x_, float y_) {
    x = x_;
    y = y_;
    r = 1;
  }

  void show() {
    stroke(100 + (y/grid * 10), 0 + (y/grid * 10), 255 + (y/grid * 10));
    strokeWeight(2);
    fill(100 + (y/grid * 10), 0 + (y/grid * 10), 255 + (y/grid * 10), 80);
    ellipse(x, y, r*2, r*2);
  }

  boolean edges() {
    return (x + r > width || x - r < 0 || y + r > height || y - r < 0);
  }

  void grow() {
    if (growing) {
      r = r + 1;
    }
  }
}

class Screen {
  char imagename;
  PImage img;
  ArrayList<PVector> spots;
  String type;
  int positionx = 0;
  int positiony = 0;

  Screen(char imgnm, String type_) {
    type = type_;
    imagename = imgnm;
    spots = new ArrayList<PVector>();
    img = loadImage(sketchPath("") + "/" + "source/images/" + str(imagename) + ".PNG");

    switch(type) {
    case "hr":
      img.resize(5 * grid, 8 * grid);
      img.loadPixels();
      positionx = 0;
      break;
    case "hr2":
      img.resize(5 * grid, 8 * grid);
      img.loadPixels();
      positionx = grid * 6;
      break;
    case "mn":
      img.resize(5 * grid, 8 * grid);
      img.loadPixels();
      positionx = grid * 15;
      break;
    case "mn2":
      img.resize(5 * grid, 8 * grid);
      img.loadPixels();
      positionx = grid * 21;
      break;
    case "colon":
      img.resize(2 * grid, 0);
      img.loadPixels();
      positionx = grid * 12;
      positiony = grid * 2;
      break;
    }

    for (int x = 0; x < img.width; x++) {
      for (int y = 0; y < img.height; y++) {
        int index = x + y * img.width;
        color c = img.pixels[index];
        float b = brightness(c);
        if (b < 100) {
          spots.add(new PVector(x + positionx, y + (height / 2 - grid * 4) + positiony));
        }
      }
    }
  }
}

Fast sin() test , and random()

$
0
0

EDIT:

If someone could just run the sin() test and post their results than would be very interesting. This is my result

Speed test starting!
Just the loop itself took ... 14 milliseconds!
fastsin() took ... 80 milliseconds!
regularmodulo took ... 148 milliseconds!
Math.sin() took ... 208 milliseconds!

Accuracy test starting ...
2000000 tests was performed
Average deviation was 1.5023357863701483E-16
The maximum deviation was 1.1934897514720433E-15

I'm very confused why using % for modulo is so much slower than the fastmod function.

I wrote a fast sin() approximation and a test for it and wonder if it's just faster on my computer?

Also tested export application and write to file and the results are the same.

I read about intrinsic functions that may or may not be used.

Also I have an idea for a fast random() function if that would be useful?

Or some other heavily used function that could be faster.

Anyways here is the sketch.

Also tested export application and write to file and the results are the same.

final static double baseline(double x) { return x; }
final static double fastmod(double a, double b){return a - b*(long)(a/b);}
private final static double
 invfact3 = - 1 / 6D,
 invfact5 =   1 / 120D,
 invfact7 = - 1 / 5040D,
 invfact9 =   1 / 362880D,
invfact11 = - 1 / 39916800D,
invfact13 =   1 / 6227020800D,
invfact15 = - 1 / 1307674368000D,
invfact17 =   1 / 355687428096000D,
invfact19 = - 1 / 121645100408832000D,
invfact21 =   1 / 51090942171709440000D,
invfact23 = - 1 / 25852016738884976640000D,
invfact25 =   1 / 15511210043330985984000000D,
invfact27 = - 1 / 10888869450418352160768000000D,
invfact29 =   1 / 8841761993739701954543616000000D,

PI = Math.PI,
TWO_PI = Math.PI*2,

increment = 0.00001
;
final static double fastsin(double x) {
  final double x0 = fastmod(x,TWO_PI);
                x = fastmod(x,PI);
  final double x2=x*x;
    x = x
    + (x*=x2) * invfact3
    + (x*=x2) * invfact5
    + (x*=x2) * invfact7
    + (x*=x2) * invfact9
    + (x*=x2) * invfact11
    + (x*=x2) * invfact13
    + (x*=x2) * invfact15
    + (x*=x2) * invfact17
    + (x*=x2) * invfact19
    + (x*=x2) * invfact21
    + (x*=x2) * invfact23
    + (x*=x2) * invfact25
    + (x*=x2) * invfact27
    + (x*=x2) * invfact29
    ;
    if(Math.abs(x0)>PI){ x=-x; }
    return x;
}
final static double regularmodulo(double x) {
  double x0 = x%TWO_PI;
              x %= Math.PI;
  final double x2=x*x;
    x = x
    + (x*=x2) * invfact3
    + (x*=x2) * invfact5
    + (x*=x2) * invfact7
    + (x*=x2) * invfact9
    + (x*=x2) * invfact11
    + (x*=x2) * invfact13
    + (x*=x2) * invfact15
    + (x*=x2) * invfact17
    + (x*=x2) * invfact19
    + (x*=x2) * invfact21
    + (x*=x2) * invfact23
    + (x*=x2) * invfact25
    + (x*=x2) * invfact27
    + (x*=x2) * invfact29
    ;
    if(Math.abs(x0)>PI){ x=-x; }
    return x;
}
void setup(){
  noLoop();
}
void draw(){
  long start,stop;
  double foo=0,bar=0;
  println("Speed test starting!");
  print("Just the loop itself took ... ");
  start = System.nanoTime();
  for(int i=-1000000;i<1000000;i++){
  foo+=baseline(i*increment);
  }
  stop = System.nanoTime();
  println((stop-start)/1000000 + " milliseconds!");
  bar+=foo;
  foo=0;
  print("fastsin() took ... ");
  start = System.nanoTime();
  for(int i=-1000000;i<1000000;i++){
  foo+=fastsin(i*increment);
  }
  stop = System.nanoTime();
  println((stop-start)/1000000 + " milliseconds!");
  bar+=foo;
  foo=0;
  print("regularmodulo took ... ");
  start = System.nanoTime();
  for(int i=-1000000;i<1000000;i++){
  foo+=regularmodulo(i*increment);
  }
  stop = System.nanoTime();
  println((stop-start)/1000000 + " milliseconds!");
  bar+=foo;
  foo=0;
  print("Math.sin() took ... ");
  start = System.nanoTime();
  for(int i=-1000000;i<1000000;i++){
  foo+=Math.sin(i);
  }
  stop = System.nanoTime();
  println( (stop-start)/1000000 + " milliseconds!");
  bar+=foo;
  println(bar==1?".":"");
  println("Accuracy test starting ...");
  long tests = 0;
  double maxdeviation = 0;
  double totaldeviation = 0;
  double dev = 0;
  for(int i=-1000000;i<1000000;i++, tests++){
  dev = Math.abs(Math.sin(i*increment)-fastsin(i*increment));
  if(dev>maxdeviation)maxdeviation = dev;
  totaldeviation+=dev;
  }
  println( tests + " tests was performed"  );
  println("Average deviation was " + totaldeviation/tests );
  println("The maximum deviation was " + maxdeviation );
}

xorshitstar , RNG known for it's speed, https://en.wikipedia.org/wiki/Xorshift
It's supposed to use unsigned integer types but java only provides signed types.

Testing the quality of random numbers is tricky since there is different metrics.
I tested "squared deviation from the mean" and a visual comparison against random() generating static by random colors seems to work fine.

It works just like random() with two arguments, but returns double rather than a float.
For example, if you want a random float between 0 - 10 you do (float)xorshitstar(0,10)
(float)xorshitstar(-25.5,-17.7) etc ...

The X should be a global variable and initialized with a seed, for example
or a constant if you want deterministic randomness.

final static long STAR = 2685821657736338717L;
long X;

final double xorshiftstar(double start, double end){
  X ^= X >> 12;
  X ^= X << 25;
  X ^= X >> 27;
  X *= STAR;
  return start + Math.abs( ( X* Math.abs(end-start) )/Long.MAX_VALUE  ) ;
}
final static int dumb(int x) { return x; }
int upperhalf,bottom;
void setup(){
 size(200,400);
 RANDOM_LONG = System.nanoTime();
 //int[] all = new int[71];
 long start=0,stop=0;
 println("Speed test starting!");

 print("Just the loop itself took ... ");
 start = System.nanoTime();
 for(int i=0;i<100000000;i++){
   dumb(i);
 }
 stop = System.nanoTime();
 println((stop-start)/1000000 + " milliseconds!");

 print("xorshitstar took ... ");
 start = System.nanoTime();
 for(int i=0;i<100000000;i++){
   xorshiftstar(-100000,100000);
 }
 stop = System.nanoTime();
 println((stop-start)/1000000 + " milliseconds!");

 print("random() took ... ");
 start = System.nanoTime();
 for(int i=0;i<100000000;i++){
   random(-100000,100000);
 }
 stop = System.nanoTime();
 println((stop-start)/1000000 + " milliseconds!");

 print("Math.random() took ... ");
 start = System.nanoTime();
 for(int i=0;i<100000000;i++){
   Math.random();
 }
 stop = System.nanoTime();
 println((stop-start)/1000000 + " milliseconds!");

 println("Quality test starting!");
 println("Beginning with static.");
 upperhalf = width*height/2;
 bottom = width*height;
 textAlign(CENTER);
 textSize(24);
 loadPixels();
 fill(0);
}
int[] qualityxor,qualityrand;
long scoreXor,scoreRand;
int winsXor=0,winsRand=0;
void draw(){
  if(frameCount<600){
  for(int i=0;i<upperhalf;i++){
    pixels[i]=(int)random(#000000,#ffffff);
  }
  for(int i=upperhalf;i<bottom;i++){
    pixels[i]=(int)xorshiftstar(#000000,#ffffff);
  }
  updatePixels();
  text("random()",width*.5,height*.25);
  text("xorshiftstar()",width*.5,height*.75);
  }
  else{
    background(170);
    qualityxor = new int[6];
    qualityrand = new int[6];
    scoreXor = 0;
    scoreRand = 0;
    for(int i=0;i<60000000;i++){
     qualityxor[(int)xorshiftstar(0,6)]++;
     qualityrand[(int)random(0,6)]++;
  }

  for(int i=0;i<6;i++){
     int tx = Math.abs( qualityxor[i]-10000000);
     int tr = Math.abs(qualityrand[i]-10000000);
     scoreXor+=tx*tx;
     scoreRand+=tr*tr;
  }
  println("Comparing squared deviation from the mean of dice throws");
  if(scoreRand<scoreXor)
  println("random() won, and has " + (++winsRand) + " wins total!");
  else if (scoreXor<scoreRand)
  println("xorshiftstar() won, and has " + (++winsXor) + " wins total!");
  else println("OMG A TIE! Go buy a lottery ticket now!!! ");
  println("xorshiftstar() score : " +  scoreXor);
  println("      random() score : " +  scoreRand);
  println("Lower score is better!");
  println("Press the R-key for rematch");
  text("random : " + winsRand,width*.5,height*.25);
  text("xorshiftstar : " + winsXor,width*.5,height*.75);

  noLoop();

  }
}
void keyPressed(){if(keyCode=='r' || keyCode=='R')loop();}

Flight simulator 3D


I create multiplayer game on java MMORPG osc5

$
0
0

⟨⟨⟨ MMORPG GAME ⟩⟩⟩

Start: 28.9.2017

Github: https://github.com/GeorgeSikora/MMORPG

⟨⟨⟨ VERSIONS ⟩⟩⟩

v0.0.1 - not completed

⟨⟨⟨ INFORMATIONS ⟩⟩⟩

  • Player move ✔
  • Map loading ✔
  • Multiplayer ✔
  • Textures ✔
  • Menu ✔
  • Chat ✔
  • Animated player move ✘
  • Chat commands ✘
  • Map editor ✘
  • Player build ✘
  • Registration ✘
  • Collision ✘
  • Server configurations ✘

and other ideas... can you and me create ! :)

1 2 3 16town

I create MMORPG

$
0
0

do you want share code ? - library: osc5

p5.js and ws2811/ws2812 NeoPixel RGB LEDs

$
0
0

I experimented with an ESP8266 driving WS281x RGB LEDs (also known as Adafruit NeoPixels) using a p5.js sketch to create the pixel images. The ESP8266 web server and web socket server libraries make this easy to do. node.js and socket.io are not used for these demos. The source code is available on github. A few more details are here

Dot follow finger

Multiplayer MMO RPG game with Processing ! OSCP5 !

Interactive art installation powered by Processing

$
0
0

Me and a friend created an interactive installation that uses Processing to project generative graphics onto a geometric grid structure.

More info (and a video) here!

Viewing all 428 articles
Browse latest View live


Latest Images